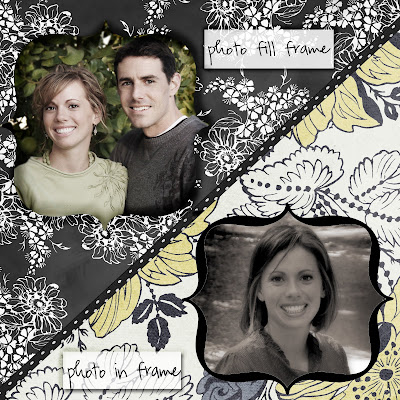
 option #2
I had seen photos cut into really neat shapes, and I just had to figure this one out. Photoshop comes installed with several shapes. All you need to do is open a photo or scrapbook element. Click on your shapes tool, then drag it across your photo. Move the photo around inside the frame and resize to taste. Sounds easy enough.
But what if you have an element that is not a shapes file.....and you want the photo to lie within the shape of that element?
First I open the blank document and add the shape ontop of it. I place it where I want it. Now I need to remove the white part of the shape. So I click on my magic wand tool and click on the white space. It should select the white area. Now I just hit delete and the white area is now transparent (checkerboard). Now I will flatten all images. Now, I double click on the only layer (the background layer) and rename it anything I want. By renaming it, It isn't locked anymore. I click on 'make a new layer' and drag that layer below my original layer. I add my photo to that new layer. Because this layer is below the layer with the shape, the photo is peaking right through it, just like a frame. Tricky, but once you got it, you got it. I just love these bracket frames.
To download more shapes, check out www.ladyoak.com. She has more than just shapes so check it out.


1 comment:
Just found your blog - it looks good! If your 'non-shape' element is a black frame with white inside then place it over the photo and then change the blending mode to multiply. The white should disappear, leaving your frame. Try it and let me know if it works for you. :)
Post a Comment