
In my previous post titled 'How to get grundgy edges', I discussed using clipping masks as an option. As you can imagine, clipping masks can come in any design. In the below photo I picked an orange color from the photo to use with my clipping mask, so that the photo blended well together. See my tutorial from the previous post on how to use clipping masks.
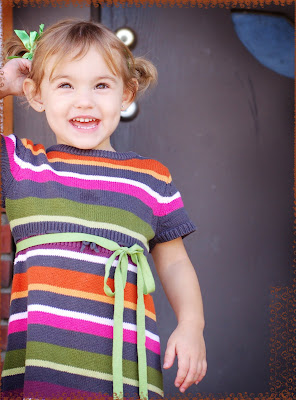 Obviously, in the two photos below, I used a white colored clipping mask.
 I used the photo below for the FIRST image you see in this post. Once I attached the clipping mask, I dragged this image onto a white blank document. I added a dark scratch overlay (using a layer mask to erase the effect of the overlay from the photo) and then added some fun text.
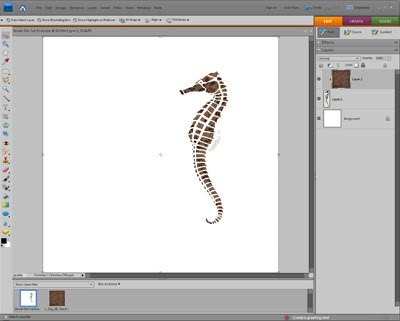
 Now, pick a brush and stamp it directly onto that new layer. In this example a SEA HORSE will be used.
Now, with the paper layer selected click CTRL+G (which will group it with previous). You paper has now taken on the shape of your brush.Obviously, in the two photos below, I used a white colored clipping mask.I used the photo below for the FIRST image you see in this post. Once I attached the clipping mask, I dragged this image onto a white blank document. I added a dark scratch overlay (using a layer mask to erase the effect of the overlay from the photo) and then added some fun text.
I subscribe to thedigitalscrapbookteacher.com. I own her book which is where a lot of this started. (See my previous post titled 'computer smarts???? Here is a Start'. Each month she emails a newsletter with great scrapbooking tips. Here is her latest one. If you like it, subscribe at her website for more.
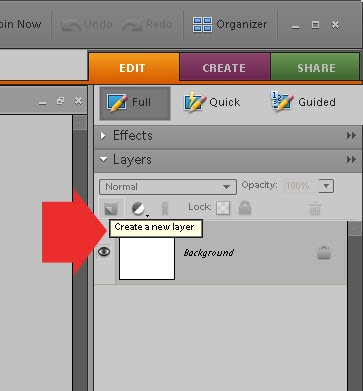
Open your software and open a new blank document at 300DPI, white background, RGB color.
Click on the 'new layer' icon in your layers pallette.
Now, pick a brush and stamp it directly onto that new layer. In this example a SEA HORSE will be used.Now, open a paper of your choice (this example is using a flowered brown paper). Once opened drag in down onto the brush stroke in the project bin. It will appear that you have two pieces of paper open in the project bin, but if you look to the right in your layers pallette, you will see 3 layers, with the paper layer on top (which is why you can't see the Sea Horse brushstroke anymore)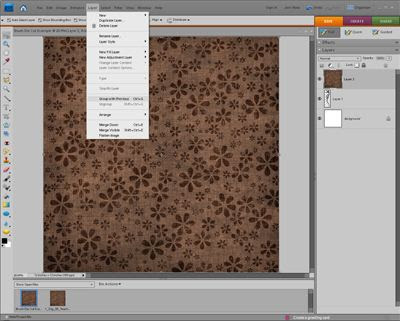


No comments:
Post a Comment