 What a cute Idea. Take photographs off letters and numbers and crop them to 1 inch by 1 inch and then clip them together to make a calendar. At the end of each month, rotate the numbers. The good thing is that you only have to rotate the columns because for example, 14,21,and 28 will always be under 7. I made one, but tried using paperclips..........I need to find the clips that this person used. Or you could put a magnet on the back of each number and magnet them to a magnet board you can get from office depot.
Tuesday, April 28, 2009
Urban Photo Calendar
What a cute Idea. Take photographs off letters and numbers and crop them to 1 inch by 1 inch and then clip them together to make a calendar. At the end of each month, rotate the numbers. The good thing is that you only have to rotate the columns because for example, 14,21,and 28 will always be under 7. I made one, but tried using paperclips..........I need to find the clips that this person used. Or you could put a magnet on the back of each number and magnet them to a magnet board you can get from office depot.
Monday, April 20, 2009
Filters
Several filters come built in with your photoshop software, including effects to make your photo look like a sketch, a cartoon, blurred, texturized, etc. I like to use these for my backgrounds.
So I use the selection brush to select the foreground. Of course, I magnify the image, so I can get every little pixel. Then I invert the selection, so the background is selected, then I apply my desired filter. This pic is using a film grain filter

.JPG)
and this one is using a stained glass filter.
Friday, April 10, 2009
I Love Lomography
This first picture is photoshopped to look like lomo. There is a type of old, crappy Russian camera (Lomo) that produces pictures like these. But todays standard camera can't accomplish this look........................but after several photoshop steps, you can achieve this look. I use PS-Elements 6.0, so I will tell you how I did it, then you can modify it to your individual software.
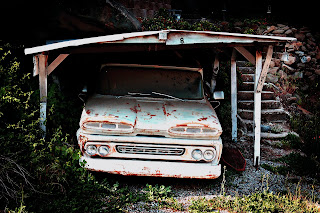
photoshopped image to look like Lomo
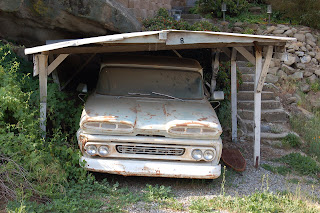
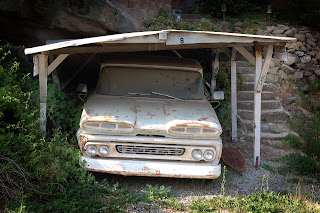
naked or SOOC(straight out of camera)
1.First, create a vignette (this causes the edges to become darker) by using the lasso tool and tracing a circle around the object in the picture. Inverse the selection. Now go to layers-new adjustment layer-levels. Move the middle slider arrow to the right until you reach desired effect. Here is what your picture will look like now. Merge layers
2. Now click on Enhance -adjust color-adjust color curves. Move the sliders to create a slanted "s". You really only need to move 2 sliders to do so.
3. Now click on Enhance -adjust color-adjust hue/saturation. Move the hue slider slightly to the left until you get desired effect. (I move the hue to -15)
4. Now create a fill layer and using the paint bucket, fill the layer with black. Click on that layer in your layers pallette and adjust the opacity. I put mine at 10% opacity.
5. Now click on Enhance-Unsharp Mask. Put it at 50% and increase the radius (I put mine at 35) and set the threshold to 0.

photoshopped image to look like Lomo

naked or SOOC(straight out of camera)
1.First, create a vignette (this causes the edges to become darker) by using the lasso tool and tracing a circle around the object in the picture. Inverse the selection. Now go to layers-new adjustment layer-levels. Move the middle slider arrow to the right until you reach desired effect. Here is what your picture will look like now. Merge layers

2. Now click on Enhance -adjust color-adjust color curves. Move the sliders to create a slanted "s". You really only need to move 2 sliders to do so.
3. Now click on Enhance -adjust color-adjust hue/saturation. Move the hue slider slightly to the left until you get desired effect. (I move the hue to -15)
4. Now create a fill layer and using the paint bucket, fill the layer with black. Click on that layer in your layers pallette and adjust the opacity. I put mine at 10% opacity.
5. Now click on Enhance-Unsharp Mask. Put it at 50% and increase the radius (I put mine at 35) and set the threshold to 0.
6. As an option, you can try a different mode. Click on Image-Mode-Indexed color. If you don't like the effect then Edit-Undo. Merge all layers and save as a JPEG.
And there you have it. I am hoping that somebody will make an action that will do all these steps with the click of a button. I'll keep looking for one. Click here to the coffee shop actions. She does have a free downloadable vignette action that will save you some time.
And there you have it. I am hoping that somebody will make an action that will do all these steps with the click of a button. I'll keep looking for one. Click here to the coffee shop actions. She does have a free downloadable vignette action that will save you some time.
Monday, April 6, 2009
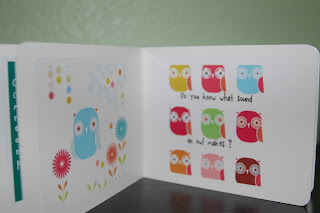
Photo Board Books
.JPG)
I love making photo books and I just found a company that will make board books. Check out blank slate. With other companies you send them the pictures and they print the book and are pretty expensive. With this company, they send you the blank board book and adhesive printing labels and you just print from home. I'm trying to find a way to laminate it better, so that it lasts longer. I found some great kid friendly images online and uploaded them into photoshop and added my own text. You could use photographs instead of pictures, though.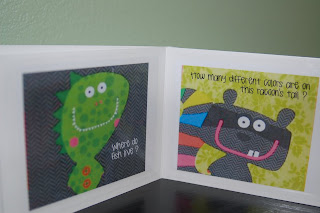.JPG)
.JPG)

Subscribe to:
Posts (Atom)


