Monday, March 30, 2009

Digital Scrapbooking????????????

I get a lot of questions on what digital scrapbooking is and how I make flyers, photobooks, and blog layouts. Well the answer is simply this.
Anything you can make with paper, you can make digitally,except you now have way more options. You purchase paper, buttons, tags, (you name it) from online digital scrapbooking stores(such as shabby princess,polkadot potato). You purchase a program to make your layouts such as Paint Shop Pro, Photoshop, and a few others. Using the software, you open, click and drag different pieces onto your page.


Here are the pros:


-Once you buy something, you can use it forever on other projects and depending on how cool your software is, you can even change it's shape and color. For example, I can purchase a small blue button for a cute baby boy scrapbook page and later can turn it pink,enlarge it for a whole new look on another page.


-It's faster, once you learn the shortcuts.


-No more sticky fingers with dots,glue,tape,etc.


-If your kids wake up or get cranky, you can easily click save.........rather than trying to clean everything up so your toddler doesn't get into it.


-It's also cheaper because you can send several pages at a time to online companies like blurb, or shutterfly and they will bound it into a book at $1 a page. That is very cheap, compared to traditional scrapbooking. You don't have to pay for developing the photo either.


-You can always go hybrid (do a little bit of both)


Here is a recent page I did for my daughters's birthday.


Here are some tutorials and help on how to get started:


http://www.theshabbyshoppe.com/tutorials/software_tutorials.asp

http://www.theshabbyshoppe.com/scripts/digiscrapping.asp

Monday, March 23, 2009

Finding and Installing FONTS

I love fonts. My favorites are the cute handwriting type fonts. You can find companies online that will turn your handwriting into a font for a fee. However, check out http://kevinandamanda.com/fonts/fontsforpeas/. Amanda will do it for free if you follow her instructions carefully. Here is my handwriting called Pea*Rayn.

Now what does this have to do with photography, you ask? Well yes you can use fonts in WORD files, but if you are a digi-scrapper, you will really appreciate having some great fonts.
Also check out http://www.dafont.com/. They have a lot of free fonts for download, I love some of their monogrammed fonts.
Here is how to install on Windows VISTA, but should be similar in other versions.
-download the font into the following folder: C:drive>user>documents>fonts.....or create it if you don't have it.
-unzip the compressed folder
-go to contol panel>fonts(be sure you are in classic view). Click on "install new font". If you can not find this command, then right click on the fonts folder and you should see the command to install a new font.
-select the path to find the folder that you downloaded the font into. Once found, click on it and click ok. (Be sure to check "copy fonts to Fonts foler")
-now when you start typing you should see the new font added,if not you either forgot to unzip the file first, or you just need to restart your computer.
Good Luck!

Sunday, March 15, 2009

Photos into Stamps


How would you like to make your own adorable stamps. Click here. You can turn any photo into a real stamp. It's amazing all the things you can do with photos these days.

Monday, March 9, 2009

Wall Murals

These are perfect for a guy's bedroom, or any other themed room. At PB Teen, you can choose from several different photographs that are made into a 4' x 6' mural that you can hang on a wall. I first saw this in my step-brother's room. He had a mural of a skateboarder and it looked really cool. They sell for about $99, but I found this snoboarder one in their clearance section online. They have more than just sports, so check them out.

Monday, March 2, 2009

Black & White with Color

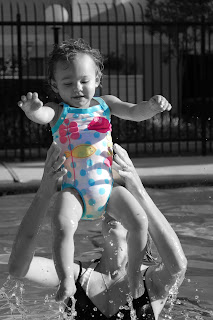
There are two ways to add color to your B & W photo
The first photo I like to refer to as "peek-a-boo" color. Start with a colored photo. The easiest way to do this is to use the selection brush and paint over the section you want to keep colored. (Be sure to magnify your image, so you can paint as close to the edges as possible to get every pixel). Then, inverse your selction, so the background is now selected. Then, choose 'convert to black and white'. Only your selected area will become black and white. It's that easy.


The second photo is called "hand tinting". First you want to make your entire picture black and white. Select the brush tool (not the selection brush tool, just the brush tool). Choose a brush with soft edges and choose a foreground color. In this picture, I chose the color pink and painted on top of the B&W dress ( I set the opacity to 50%. Had I left it at 100% it would have been to opaque and dark, and you wouldn't be able to see the polka dots as well) I painted over the bunny with brown at 50% opacity and yellow on the duck at 50% opacity.
If you haven't read my blog, then you should know that I am using Photoshop Elements software to do this.
Here are some really good tips. Always make a duplicate of your photo and then photoshop the duplicate image. That way you can always preserve the original. Or................When you open up the original image, add an adjustment layer to it. You can photoshop the adjustment layer rather than the image itself.

Monday, February 23, 2009

Easy Text Effects

When you experiment with Photoshop enough, you can learn how to grundge or distress edges. You can even learn how to make torn paper. If you are a scrapbooker, just think, anything you can do with tangible scrapbook supplies, you can do with digital scrapbook supplies. The easiest way to get these effects is to purchase actions (.ATN files) which will do all the steps for you with one press of a button.


make your text look--- Make your text look
like a block------------- like it was stamped.


make your text look ---Add inked edges
like chipped paint------
Get the look of torn paper.
My favorites is the chipboard effect and inked edges. Go to Atomic Cupcake.com and you can purchase or download some of their free actions. They also have a section that gives great PS Tutorials for beginners. Check them out.
To learn how to install actions, see the below link.

Tuesday, February 17, 2009

Photography into Art and Wallpaper

If you are an HGTV junkie like me, you see that a lot of designers will use photography as art for the wall. Check out http://www.betterwallpaper.co.uk/default.aspx. You can send them a photo and they will turn it into wallpaper. Since my house isn't huge, I had Ritz camera enlarge a photo into a 20 x 26, changed it to sepia and photoshopped a little border. Put it in a frame and hung it over my mantle.

Ryan takes great pics of flowers, and I hated having them just stuffed in an album, so I framed them and put them on shelves in Kennedee's room when she was born.

Monday, February 9, 2009

Spell with Flickr

This is so cool. Go to http://metaatem.net/words/ and you can type in any word and it will pull up photos of letters to spell the word you chose. If you have ever seen those really expensive framed pictures that take your last name with cool letter photos like these and then they matte it into a frame and sell it for like $50++++++++.

Now all you have to do is choose your word, right click on each letter and save it. Upload it to your favorite photo developer and frame it yourself. Tip: on the "spell with flickr" website if you left click on the letters, it will give you several different photos to choose from for each letter.

Tuesday, January 27, 2009

Again a different action applied that I call "H_D_A" from devianart.com. and then I increased both brightness and the contrast with a soft brush selected around K.


actions into action

Here is a before and after of some pics in Malibu. The first I used an action by "night light"(set 66). To better explain. To give a picture this type of effect you would have to perform several steps with different tools (in other words there are different layers that have been added to the original background from contrast, lighting, color, opacity, blurs and other filters. An action is when somebody creats an .ATN file that puts all the steps in order. Once you download the action or .ATN file, you just have to click one button and it performs all the steps really fast for you. The only other thing I did,was I added a linear gradient using the colore black and directed it from each corner to her face. That is why the edges are darker (burned) and it gradually gets lighter in the center.


This second photo has been cropped, partially blurred with two different actions applied including "night light" (set 67). I then made a masked selection around Kennedee with a soft brush and increased the brightness and then used the burn and dodge tools for final touches.


No action applied here, I justed did a mask selection around kennedee and did a blur filter.


Wednesday, January 21, 2009

Computer Smarts? Here is a start


1 year ago, I felt pretty computer illiterate. It's amazing how much you can learn in a year. If your looking for a good digital scrapbooking how-to book, you must use thedigitalscrapbookteacher.com. You can purchase your book there and it is worth every penny. I bought another basic Photoshop elements book and it didn't give me as much in-depth info. She also gives you tons of freebies from papers to frames, buttons, etc.
However her book is for PSE 5. I have PSE 6.0, so some of her instructions didn't work with my system and this is where I really had to learn my computer. I can now download, unzip, and install anything from brushes (which are like stamps) and actions. I HEART actions. Check out atomic cupcake for some great actions and their are also some freebies at www.deviantart.com

Saturday, January 17, 2009

Photo Book for Ryan for Christmas

For Christmas I made a photobook for Ryan using blurb.com. I took some of my favorite photographs that he has taken and digitally scrapbooked them in Photoshop Elements with different tools, papers, and embelishments from online digital scrapbook stores. They published it in a beautifully put together book with a personalized dust jacket. Here is a slide show of some of the pages. He said this was the best present I ever gave him.