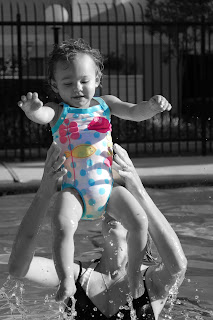
 The first photo I like to refer to as "peek-a-boo" color. Start with a colored photo. The easiest way to do this is to use the selection brush and paint over the section you want to keep colored. (Be sure to magnify your image, so you can paint as close to the edges as possible to get every pixel). Then, inverse your selction, so the background is now selected. Then, choose 'convert to black and white'. Only your selected area will become black and white. It's that easy.
_edited-2.jpg)
The second photo is called "hand tinting". First you want to make your entire picture black and white. Select the brush tool (not the selection brush tool, just the brush tool). Choose a brush with soft edges and choose a foreground color. In this picture, I chose the color pink and painted on top of the B&W dress ( I set the opacity to 50%. Had I left it at 100% it would have been to opaque and dark, and you wouldn't be able to see the polka dots as well) I painted over the bunny with brown at 50% opacity and yellow on the duck at 50% opacity.
If you haven't read my blog, then you should know that I am using Photoshop Elements software to do this.
Here are some really good tips. Always make a duplicate of your photo and then photoshop the duplicate image. That way you can always preserve the original. Or................When you open up the original image, add an adjustment layer to it. You can photoshop the adjustment layer rather than the image itself.


No comments:
Post a Comment